
The Shrine of the Sea Serpent
Making the Shrine
I want to record the process and thoughts involved into the making of my work, in case I may forgot or anyone is interested in the process. Anyway, this is a convenient place to save the behind the scenes material generated in the making of the shrine(s).
The concept
The idea of a dungeon that rotates and frees monsters was into my head for some time. Actually this idea was aimed for the 2022's edition of the Spanish version of One Page Dungeon Contest. As the Mausritter Megadungeon Mayhem of May jam was sort of the same challenge, I decided to give it a go.
The original concept in my head was a dungeon that rotates in more ways: while the actual shrine only rotates in one axis and then back to normal, the original concept allowed to rotate the dungeon 90º degrees multiple times. So, once the southern walls became the "new" floors, some devices allowed the dungeon to rotate and make the east or west walls (and even the north ones) the floors. Then, depending on the rotation status, some rooms were reachable or not. And, as the actual dungeon, water monsters once in deep wells can then go after the adventurers.
You could say that I went the easy way, and I'm glad that I did it as there's a very limited space in one page.
As somebody pointed out, my entries for the jam are Zelda-like and it's true that I'm very inspired by the Legend of Zelda series. Sure the water level mechanics was inspired by the Water Temple in Ocarina of Time.
Designing the dungeon
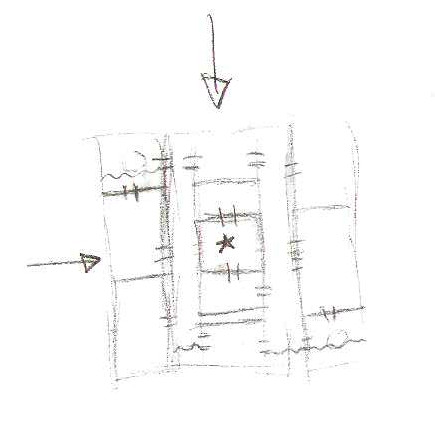
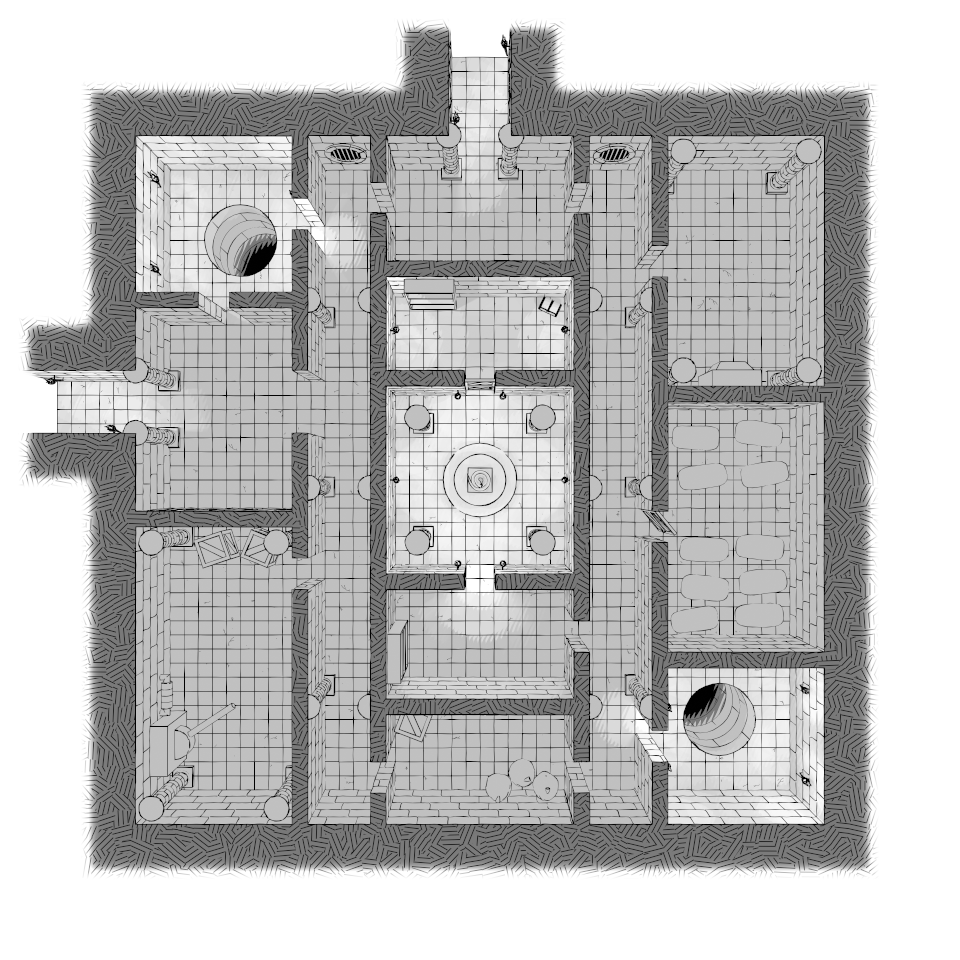
Even though I'm a digital artist, it all began on a piece of paper. I was sure that I wanted a square-shaped map and somewhat symmetric but wasn't sure about the entries location nor the doors until I started drawing. This dungeon was going to be part of a megadungeon, so adding two entries was mandatory. For the doors and the connection between rooms, I thought backwards from the relic room at the center up to the dungeon entries. Then I added some more connections between the rooms for the players not to be railroaded to the relic room. I also added two pits instead of one to make sure the players find at least one before the dungeon rotates.
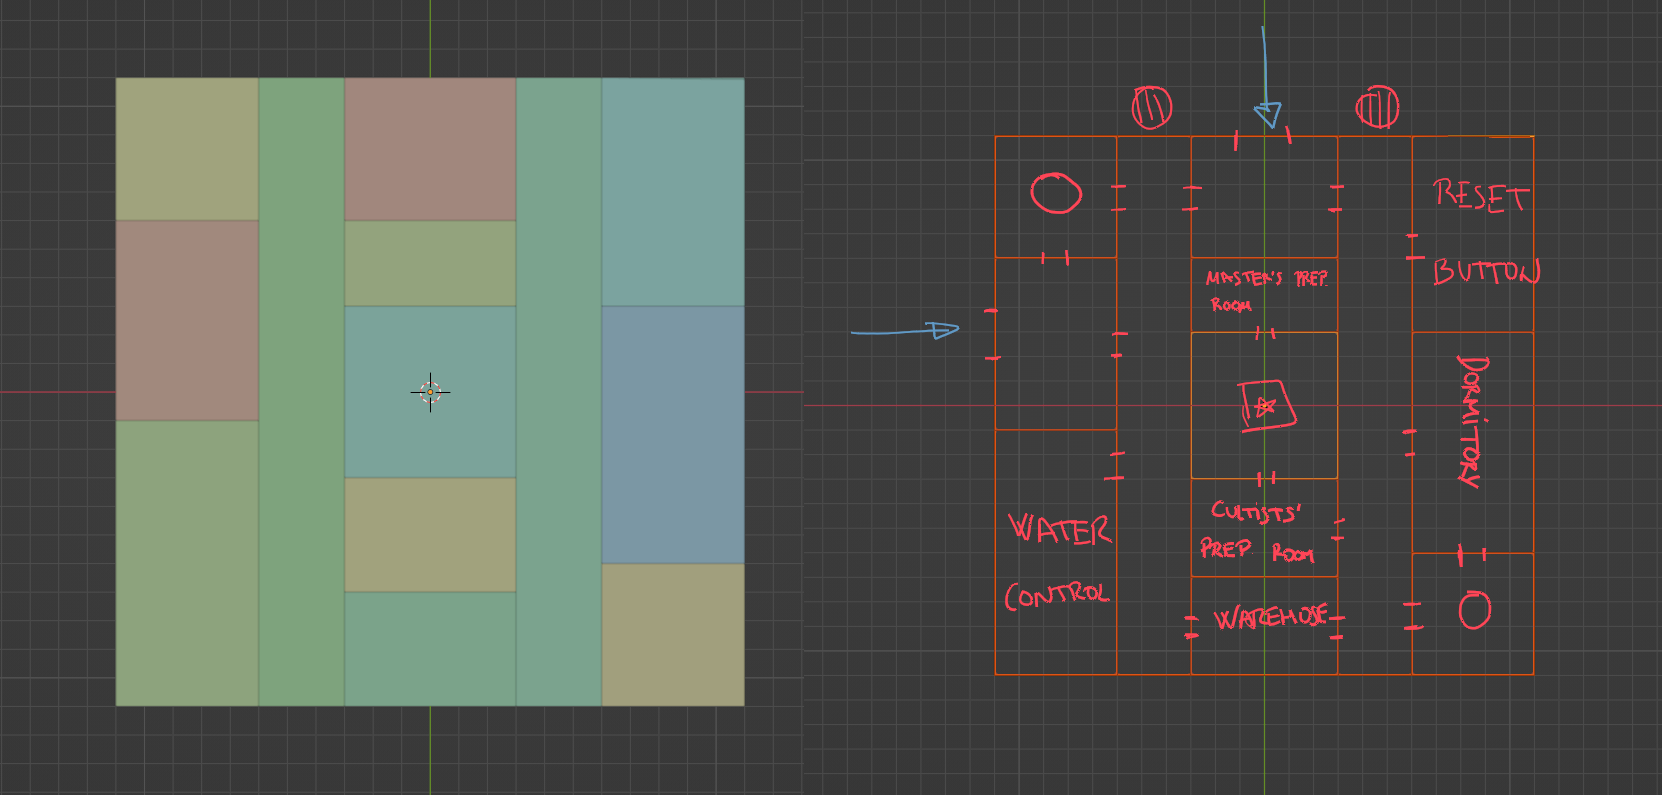
An then, started the 3D madness. As I did for Mirror Room, I worked in Blender for the whole image creation part. First, quickly defining the proportions of the rooms and corridors and then using its annotation tools to actually come up with the rooms' content.
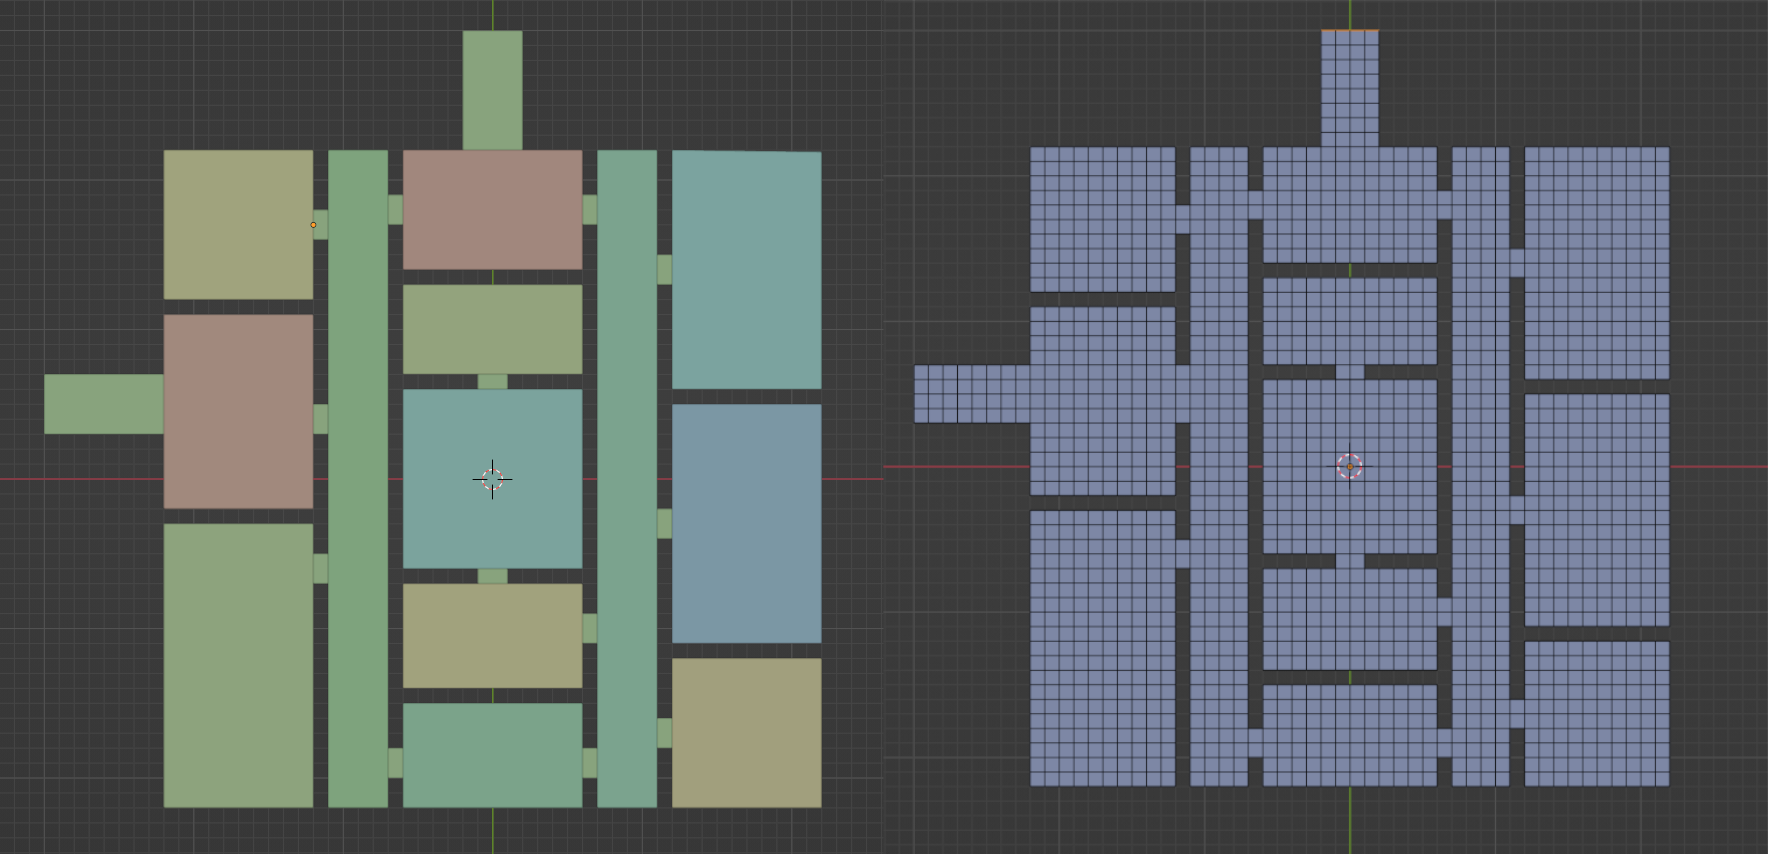
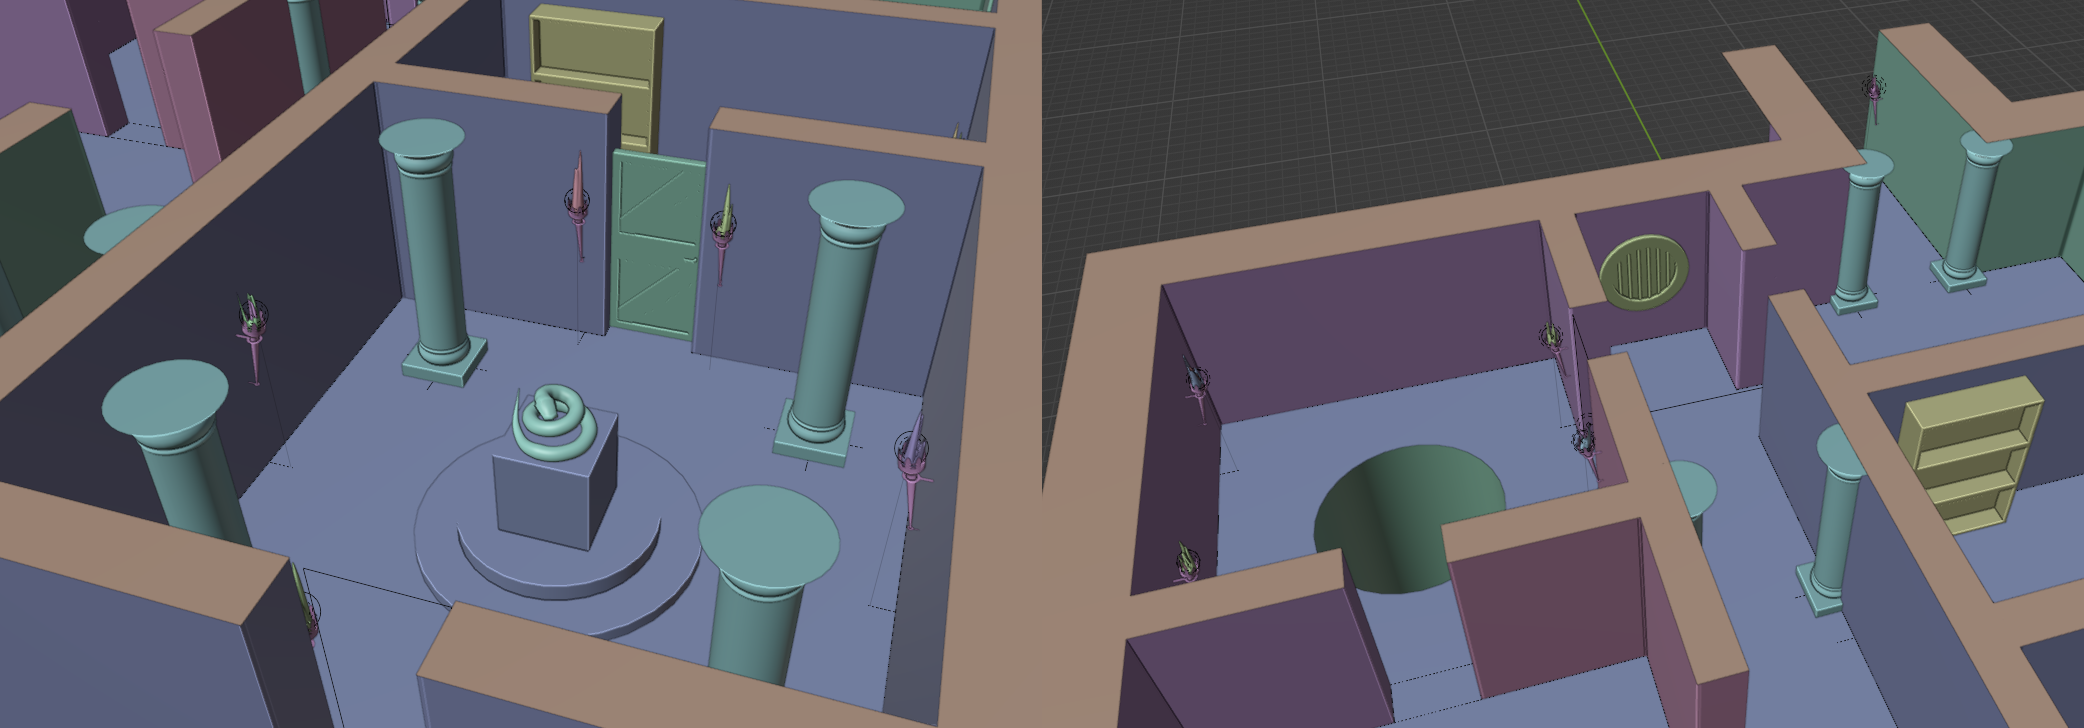
Next, I created the actual floor of the dungeon, taking into account the walls between the rooms —that, somehow I totally forgot. For now, the planes shown are not connected and they're actually multiple 3D objects (left). So the next step was to combine them into one object (right) which was the first actual final piece of the image. The tiles in the floor, otherwise redundant in an actual 3D project, were used to be rendered as lines (more of this in an upcoming Mirror Room devlog). The outline of the floor is also used to generate the walls.
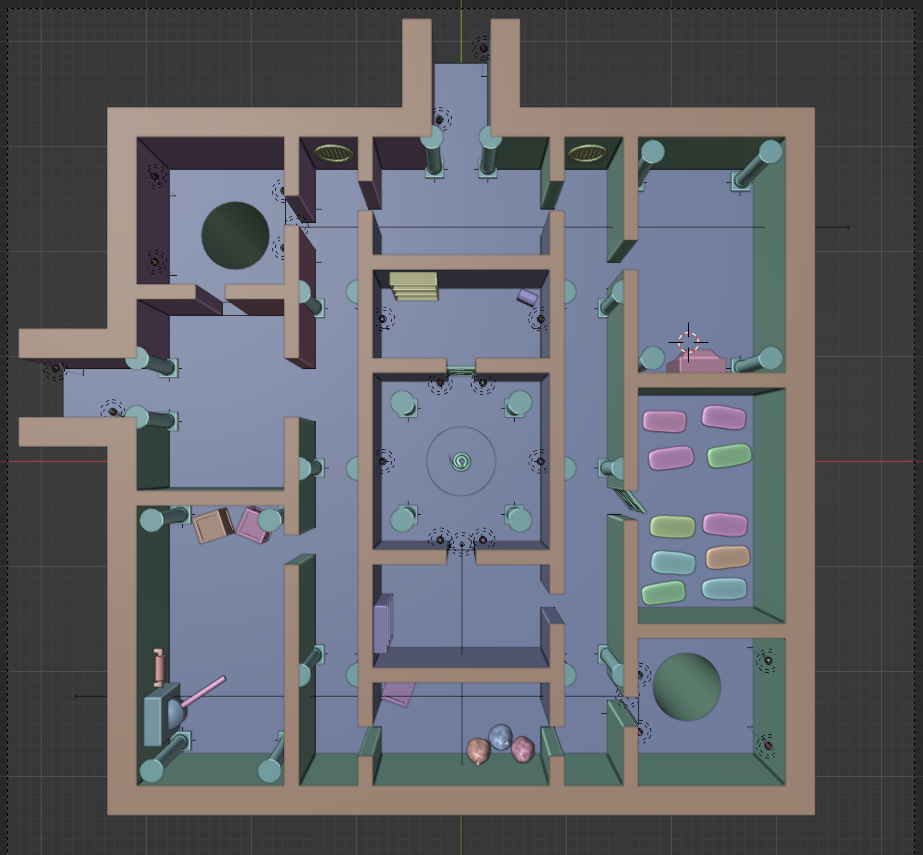
At this point it was just a matter of populating the rooms with props. Some elements, like the walls, columns and torches, were reused from Mirror Room and the rest were modeled on the fly. Some items were even reused from Perez's Assignment!
Also, you might note that a design change was made in this step: connecting the upper left pit room with the room below it. This decision was made to lure the player to the pit if they enter through the west entrance. The light in this dungeon is placed to carefully guide the players to the pits and the relic room.
The final image
My workflow, when working in 3D, is aimed to have the result as close as final as possible once I press the render button. This meaning involving the less amount of post-processing/editing work possible. Not only is a matter of time saving technique, but also to avoid repeating the work every time a change came out.
So the image editing (made with GIMP) was limited to merge the render with the hatching pattern for the insides of the walls and the dissolving effect at the edges of the image. Nothing fancy.
All the colors, lighting and shadows were managed inside of Blender with its real-time render engine and it's 2D drawing tools (more on this in an upcoming Mirror Room devlog).
Writting time
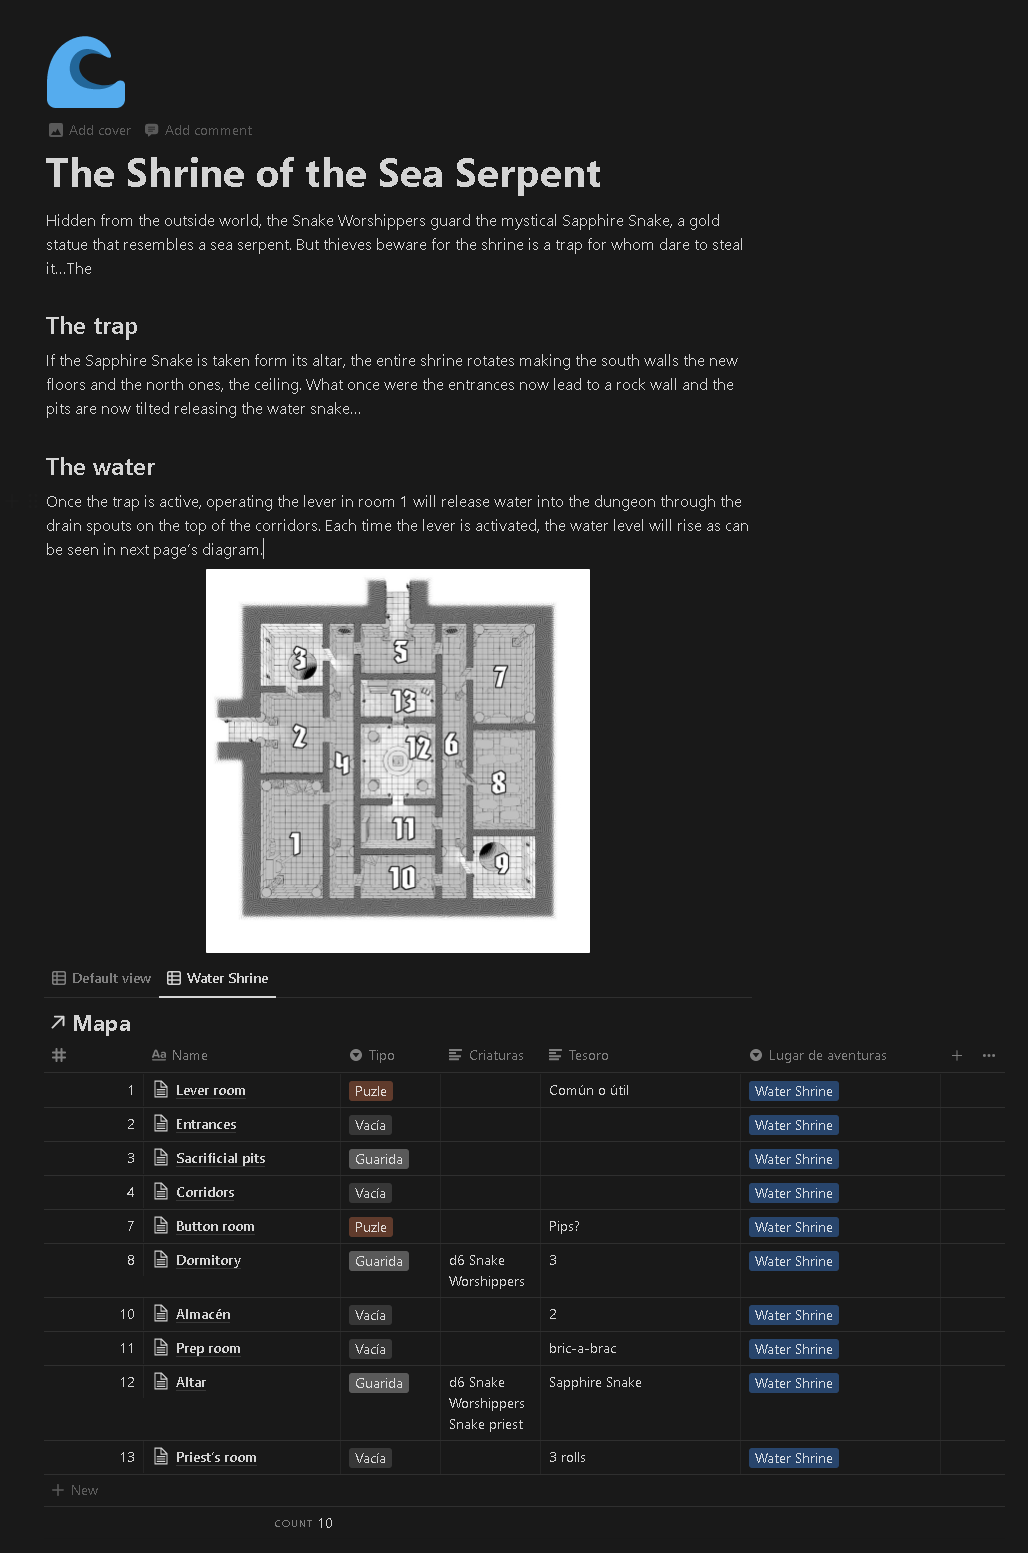
Contrary to my work on Perez's Assignment, this one was made directly in English —and is going to be tough to fit the Spanish translation into the same space. As usual, I make my writing work with Notion due to various reasons: it's cloud based, it has spelling check and is very easy to have everything organized. I even have a table for Mausritter adventure locations that I use for both my published and unpublished content.
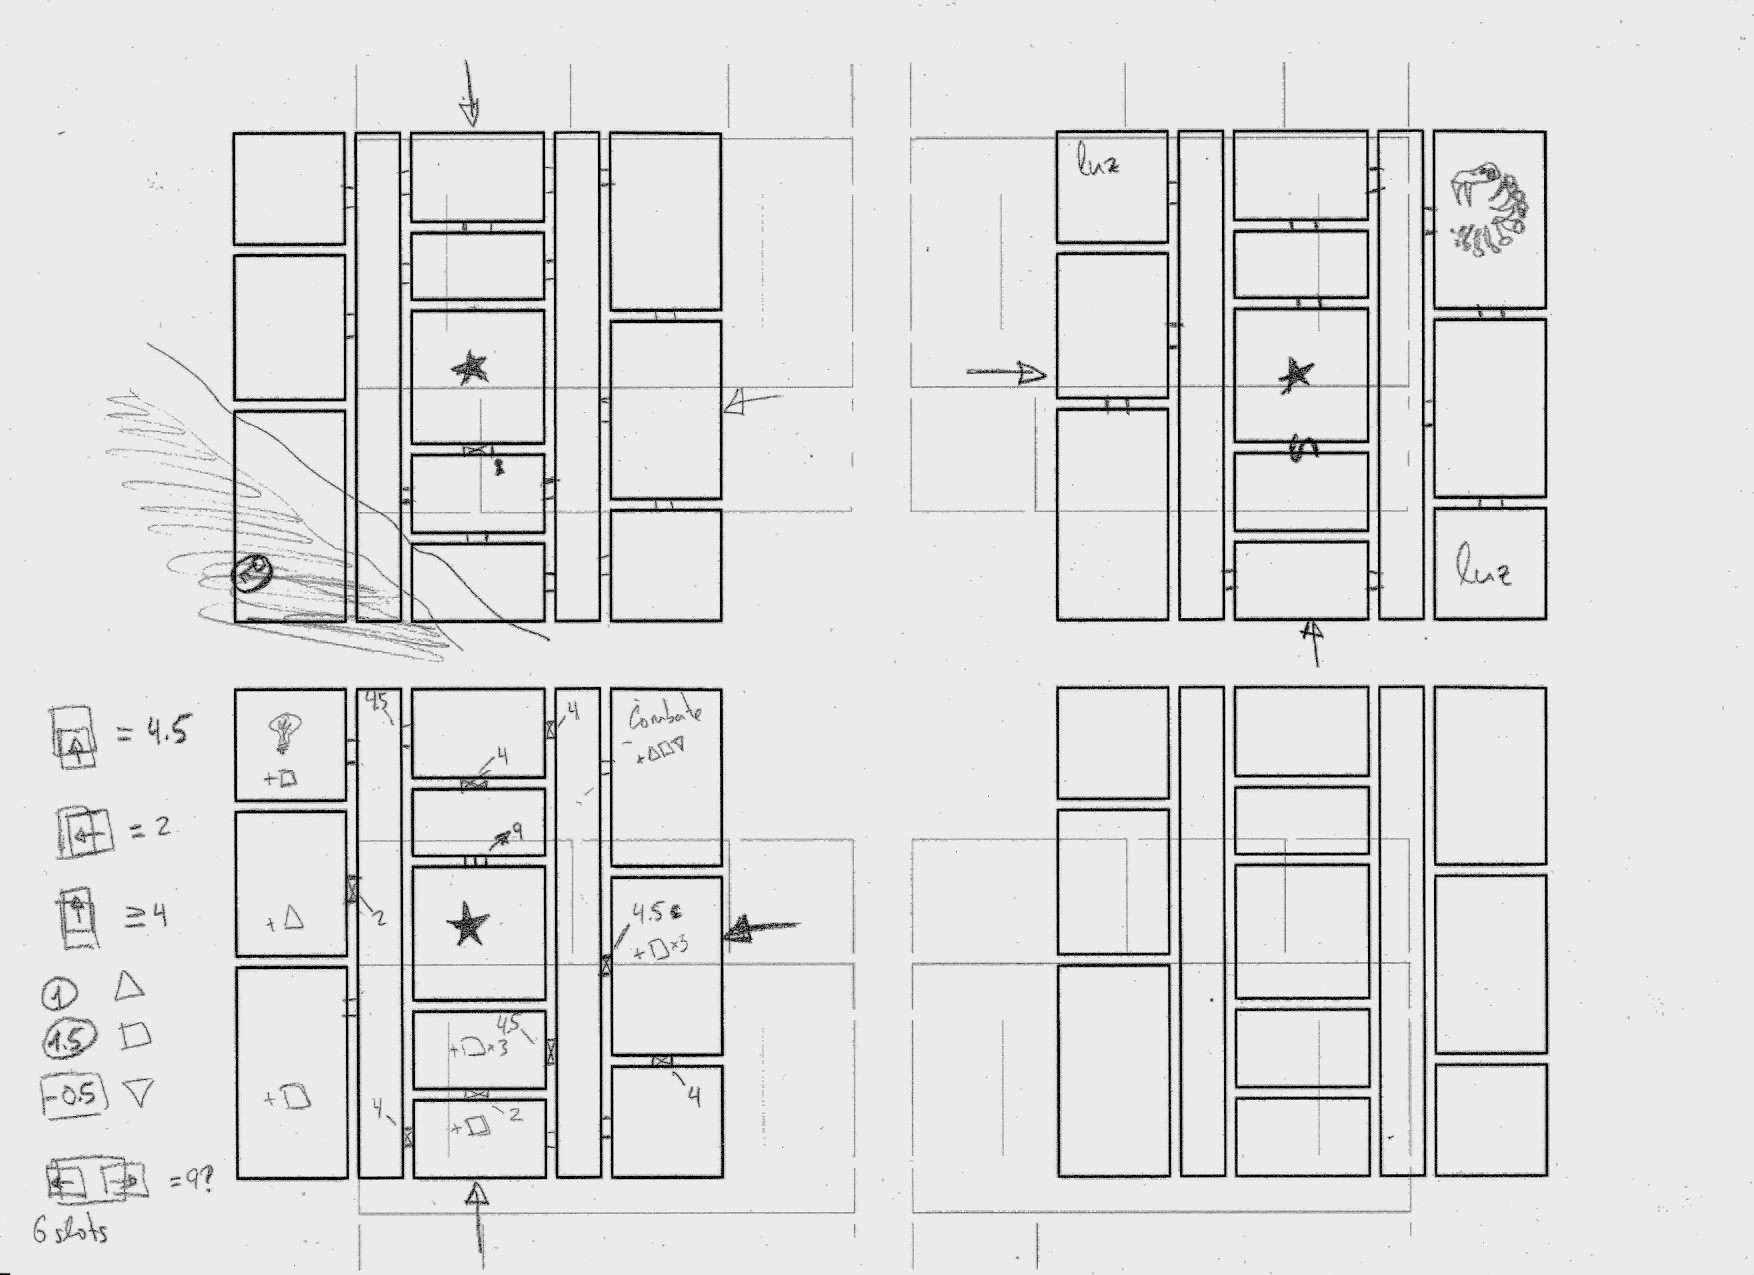
Giving the space constraint (two A5 pages), some tweaks were made directly in the publishing software, which is Scribus. Though I don't like to write directly on Scribus, sometimes you have to rewrite the paragraphs to save just a line and making everything to fit your layout. For me, the layout side of the TTRPG creation is always fun and challenging (which is the job I'm less experience in) maybe because I've only worked with zine-like content. Anyway, I had to rearrange the whole thing once I realized that a diagram about the water level was necessary.

More shrines, then?
Although my intention was to only make two entries for the jam, while making the shrine I started to have more ideas about more shrines and the cult who runs them. I had not enough time to make so much more so I decided to be resource-wise and reuse as much as I could for the next ones. The first decision was that all the shrines must have the same basic layout which would let me to work with the finished version of the water-themed one and just tweak it to make the others. The first step was printing blank layouts of the dungeon and sketching the rooms' connection for each of them with pencil, and then, working in parallel on the 3 new shrines . But that's a matter of future devlogs.
Leave a comment
Log in with itch.io to leave a comment.